


Learn how to create pad sounds with a range of powerful sound design techniques
While often referred to as synth pads, you don’t need a pad synthesiser to create your own unique pad sounds. With the use of some high-quality samples and a few creative sound design tricks, you can create bespoke pad sounds that stand out from the crowd. Whether you make house, techno, electro,breakbeat, jungle or garage, knowing how to create custom pad sounds is a useful technique to have up your sleeve. In this article, we’re going to explore some ways in which you can create your very own pad sounds.
What is a pad sound?
In the context of music production, pad sounds, pads or synth pads refer to sustained notes or chords that contain tonal elements within a composition. Pads can serve as a bed of sound that sits towards the back of the mix and helps to glue a mix together. Equally, pads can be used as the core component of a production.
Loop a tonal one-shot sample
First up, we’re going to use a one-shot synth sample from Hyper’s Breaks & Electronica sample pack. While this sample pack contains some high-quality pre-made pad sounds, it’s good to know how to create your own too.
For this technique, we’ll need a tonal one-shot synth sample. In this case, we’re using the BE_Sizzle_Synth_C3 sample. Once you’ve chosen your sample, load it into your favourite sampler. We’re using Ableton Live’s trusty Sampler device, but you can use any sampler with loop and crossfade functions.
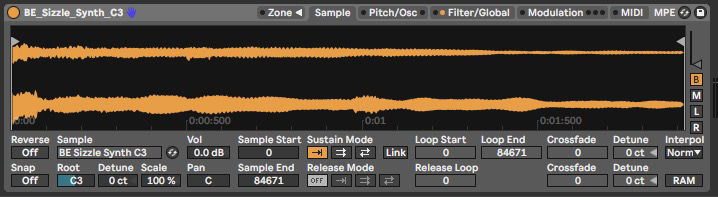
Engage the loop playback mode of your sampler, and set the start and end points around a section of the sample that gives you a nice smooth sound with no pops or clicks.
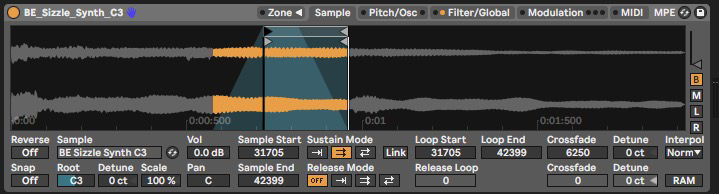
You should have a nice constant sound, but depending on your sampler’s default ADSR settings, your pad probably starts and stops too abruptly. To fix this, head to your sampler’s ADSR settings and increase the attack and release times.
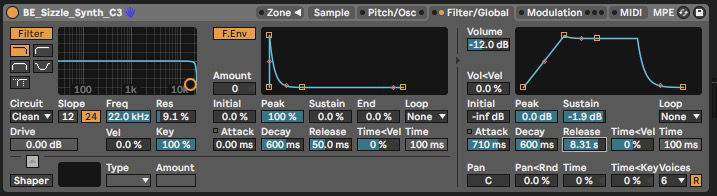
Now you have the basis of your pad sound, you can take it a step further using filters or EQ to alter the tone, LFOs to add some movement, or reverb and delay to add space.
Apply a huge reverb to a sample
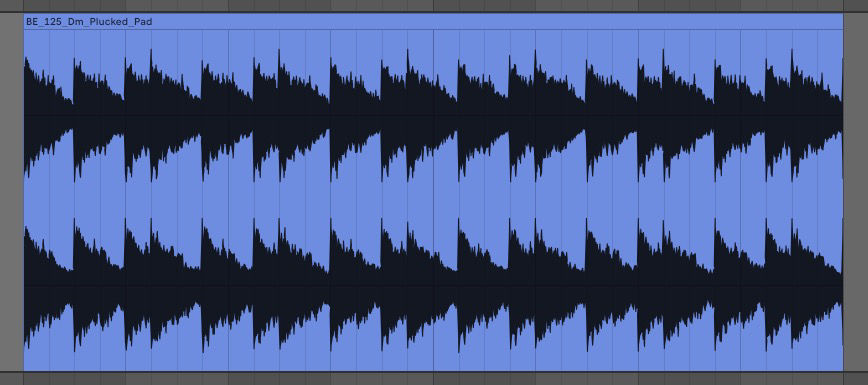
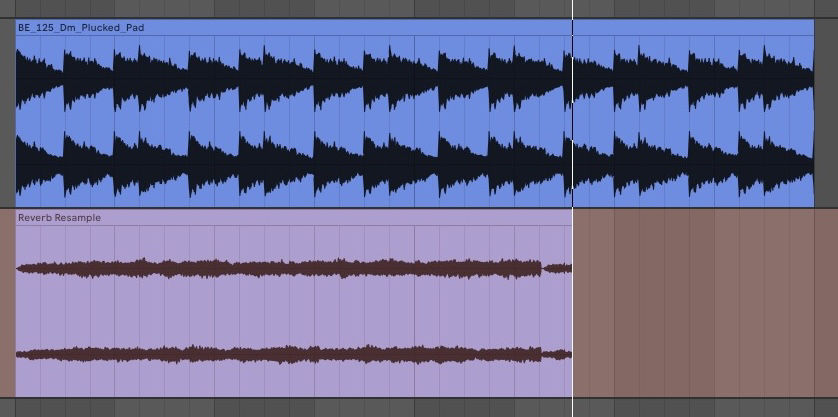
Next, we’re going to take a pad loop sample from the same Breaks & Electronica sample pack, and then add some extreme reverb to create an entirely new pad sound. Choose a sample while considering its harmonic content, timbre and melody, then drag it into your DAW. It doesn’t matter whether your sample is a legato-style pad or more of a rhythmic pad, as the reverb is going to wash over the dynamic content of the sample anyway. We’re using BE_125_Dm_Plucked_Pad, which is a rhythmic pad that contains the right tonality and timbre for our project.
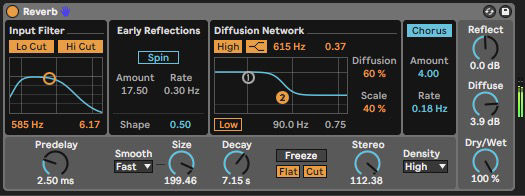
Once your sample is in your DAW’s timeline, you can transpose your sample to another key if you wish. Then, add a reverb to the audio channel. Once again, we’re using the native Ableton Live Reverb, but different reverbs will garner varying results so don’t be afraid to get creative. Set your reverb’s mix amount to 100% Wet and increase the Decay time to at least seven seconds.
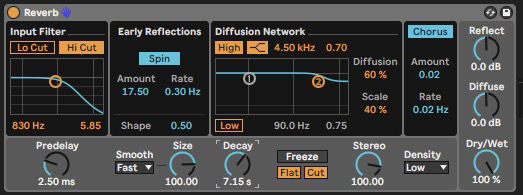
This should give you some resemblance of a pad sound. Now you can continue to tweak your Reverb until you find the kind of character you’re after. Try experimenting with EQ, Size and Diffusion to alter the tone and timbre of your pad sound.
Once you’ve created your perfect pad, you can resample it onto a new audio track for use at any time.
Emphasise the resonant frequencies of a noisy sample
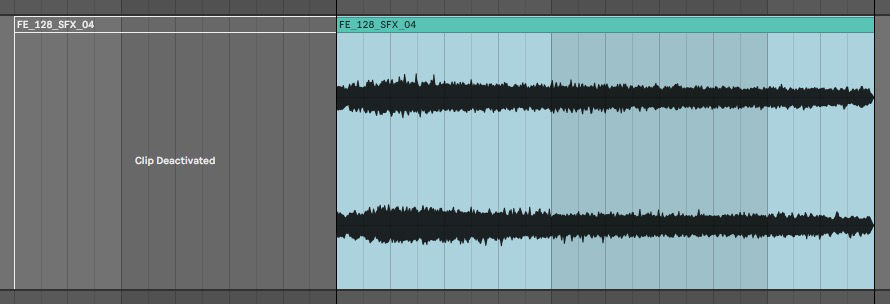
In the first two techniques, we used tonal samples to create unique pad sounds. For this technique, we’re going to need an atonal sample. Noise, texture and FX samples are usually suitable for this technique as they often contain very little melodic content. The FE_128_SFX_04 sample from Hyper’s Funky Electro sample pack is a great example of this. We’ve isolated the second half of this sample as it contains a sustained portion of noise, which is ideal for this technique to work well.
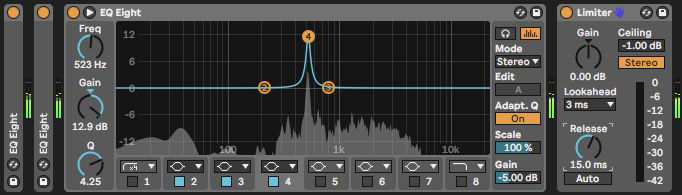
Now place your chosen parametric EQ on the channel and set a bell curve to 523Hz, which corresponds to the note C4. Now increase the curve’s Gain and Q value to create a sharp peak.
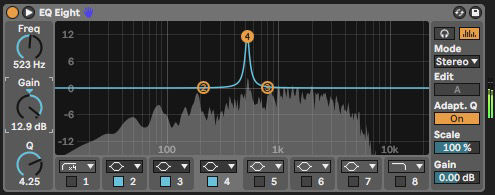
Duplicate your EQ device, and you should start to hear the EQs bringing out the tonal content of your atonal sample. If not, you can duplicate the EQ again to create three identical EQs. At this point, the extreme EQ peaks may begin to clip your audio channel so it’s worth placing a limiter after the EQs or reducing the output gain of each EQ.
You can now combine the first two techniques from this article to add some space and character to your noise pad. First, add some reverb to the channel, then resample it and load it into your chosen sampler. You can now play your pad sample chromatically.
Create a custom wavetable with any sample
We started this article by saying you don’t need a pad synthesiser to create compelling pad sounds, which is true. But using a synth does open up a few more sound design possibilities. For this technique, you’ll need a wavetable synthesiser that is capable of creating custom wavetables. Ableton Live’s own Wavetable synth will do the trick, or there’s Xfer’s powerful Serum synth. If you don’t have access to Wavetable or Serum, Vital is a great alternative to Serum, and it’s completely free. We wrote about Vital when it was launched back in 2020, and you can read more about it here.
Once you’ve chosen your wavetable synth and loaded it onto a MIDI channel in your DAW, it’s time to select a sample to turn into a custom wavetable. This may take some trial and error, as it’s difficult to know how an audio sample will sound when played back as a wavetable. Experiment with creating custom wavetables from various samples by clicking and dragging them into your synth’s wavetable window.

As you can see in the wavetable viewer above, transient drum sounds such as hi-hats and claps can sound thin and fragile when converted into a wavetable. For denser and more well-rounded tones, try using synth one-shots and kicks. The FE_C_Synth_02 sample from the Funky Electro sample pack creates a nice timbre when loaded into Wavetable.

With your custom wavetable created, you can start to make your sample sound more like a pad using some of the techniques we’ve already covered. Slow down the synth’s Attack and Release, filter out some unwanted frequencies, and add some movement with modulation.

To make full use of the power of wavetable synthesis, try modulating the oscillator position with an envelope or LFO. As you play back your pad sound, the oscillator shape cycles through the waveform, resulting in an evolving sound that lends itself to pad sound design.
Apply spectral processing to any sample
For the final technique in this article, we’re going to make use of a free plugin that’s well worth adding to your plugin folder. PaulXStretch by Sonosaurus is a free spectral processing plugin that can apply extreme time stretching to any sample. If you’ve ever taken time stretching a bit too far, you’ll know that it can cause some digital artefacts. If you’re making jungle or breakbeat, that might be the sound you’re looking for. In other cases, you might want to apply cleaner time stretching to avoid any unwanted clicks, pops and distortion.
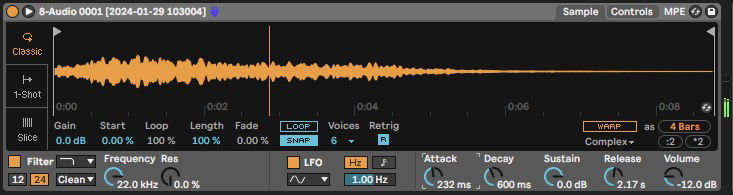
Once you’ve downloaded and installed PaulXStretch, open it in your DAW and load a sample by dragging it into the Waveform Viewer at the bottom of the plugin. Once again, transient sounds like drums may result in thinner and noisier pad tones, while tonal sounds will create more melodic content. We’ve chosen to load a rich synth chord loop into PaulXStretch. In this case, it’s the SM_128_Dm_Explain_Chords sample from Hyper’s Funky Electro sample pack.

Hit play at the top of the plugin, and PaulXStretch will start to play the sample back. You can adjust PaulXStretch’s properties as the sample plays back, and it will adjust the time stretching in almost real-time. Increase the Stretch amount for more extreme time stretching, and try using the inbuilt Low and High filters to tame any low-end rumble and high-end sibilance.
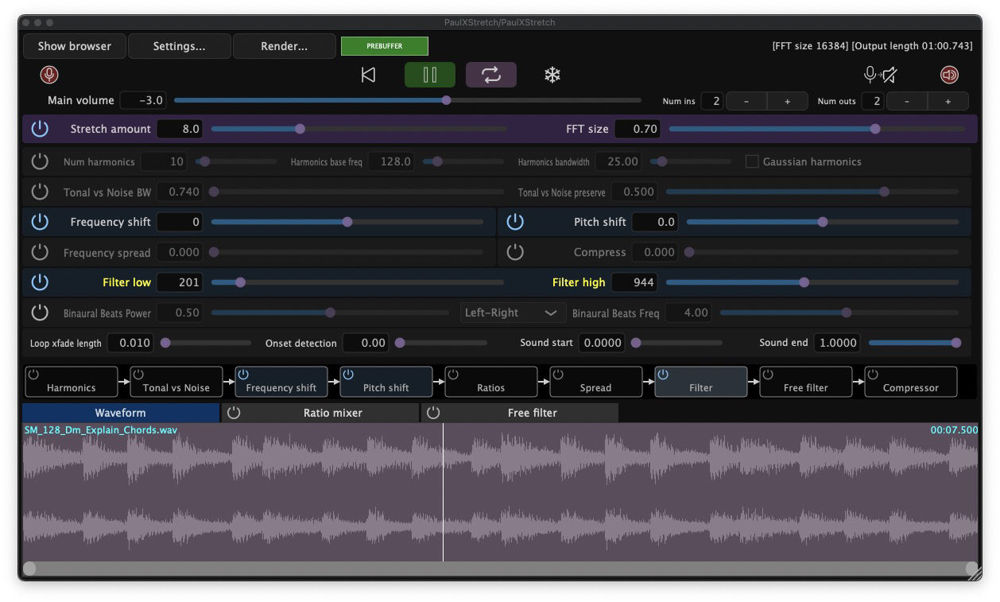
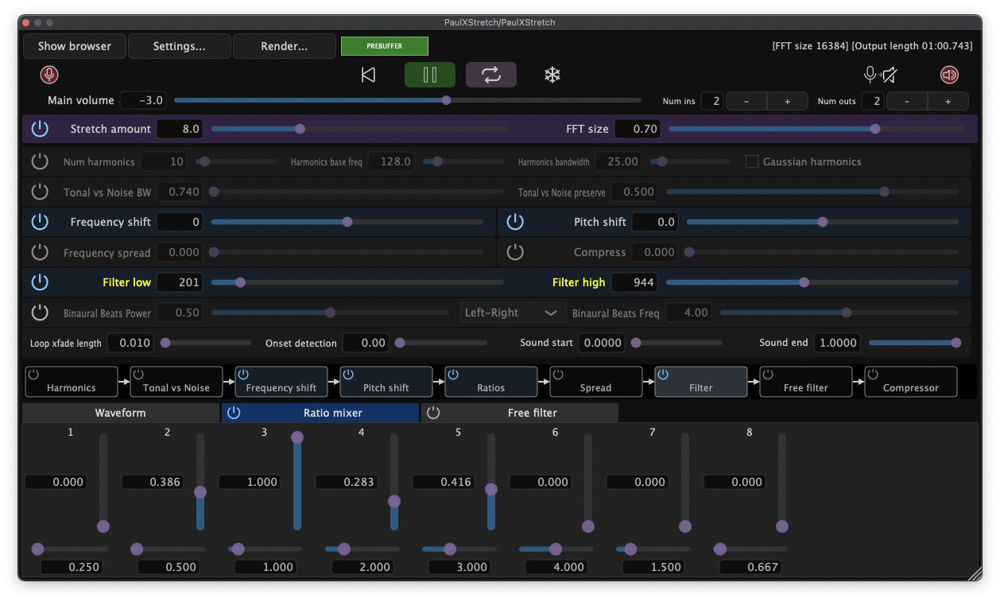
For a richer pad sound, turn on the Ratio Mixer and switch to the Ratio Mixer tab at the bottom of the plugin. Increase the level of the vertical faders to introduce different ratios of the original sound. Ratio values below one will add more low-frequency content, while ratio values above one add more high-frequency content.
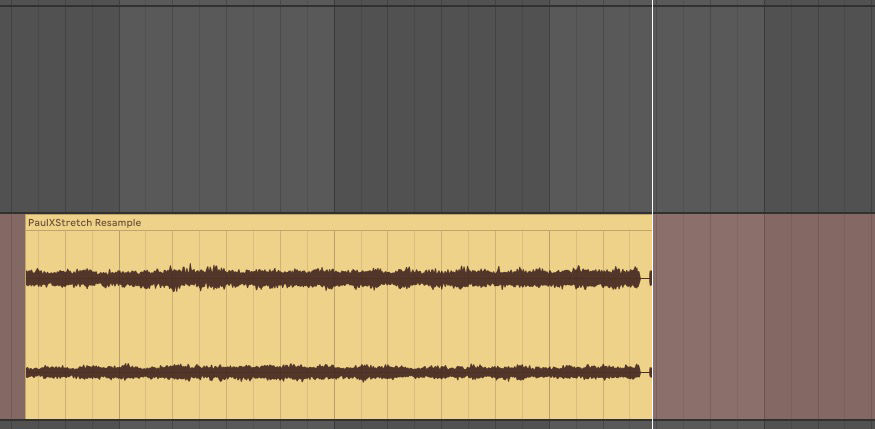
PaulXStretch is an extremely powerful and inspiring tool for creating a range of unique and evolving sounds, making it the perfect tool for generating lush pads. There are even Binaural controls, like the UDO Super 6 synth. Try experimenting with the plugins’ controls to see what you can come up with. Once you’re happy with your pad sound, you can resample it onto a new audio channel ready to use when you next need a pad sound.
Both of the sample packs used in this tutorial contain hundreds of high-quality WAV samples in both one-shot and loop format, neatly organised so you can find the samples you need when inspiration strikes. Check out Hyper’s Breaks & Electronica and Funky Electro sample packs, or browse our Sale page for professional sample packs at a discount.
