


Delve into the world of drum synthesis with this step-by-step guide to designing kicks, toms and claps from scratch.
Drum synthesis can be daunting, but it doesn't need to be. In part one of our drum synthesis series, we'll uncover the core principles behind drum synthesis as you learn how to create essential drum sounds from the ground up.

Synthesising Drums vs Using Drum Samples
You might be wondering why you would synthesise drums when there are so many great drum samples out there, but there are several reasons why you might want to create drums from scratch.
Firstly, creating your own drums gives you total control over the shape, tone, character, and length of your drums. Additionally, learning how individual drum sounds are made can help you to understand the anatomy of samples. This is particularly helpful during the sound selection and mixing process. Finally, creating your own drum samples allows you to stand out from the crowd with your own unique sounds.
Of course, you don't need to create every single sound in every one of your productions. You can use existing samples as placeholders during the writing process, then replace them with your own perfect samples later on. You can also layer existing samples with your own sounds to create dynamic and full samples that still stand out from the crowd.
Getting Started with Drum Synthesis
Let's get started by creating a few basic sounds that you might use in a variety of electronic music styles. Once you're familiar with some basic drum synthesis concepts, you should be able to apply these techniques to a range of applications in order to create a huge range of new sounds.
How to Synthesise a Kick Drum
We'll begin with arguably the easiest but most important drum to synthesise, the kick drum. Ableton Live's Wavetable is ideal for this demonstration, but you can use your preferred software synth, provided it has some flexible modulation options.
Start by selecting a pure sine wave, then setting the amp envelope to the contour of a kick. Use a very fast attack, medium decay of around 600ms, no sustain, and a fast to medium release of around 150ms. When we play a simple MIDI kick pattern with a low register note, such as G0, we just hear a very low sub frequency with no harmonics.

That might be fine on huge club sound systems, but it won't translate on smaller speaker systems. We can hear kicks on phone and laptop speakers because of the clicky transient at the start of the sound, which can be created by applying a pitch envelope. To do this in Wavetable, open the Matrix tab, then use envelope two to apply an octave of modulation in the Pitch lane. Click on Env 2 to view the ADSR settings, reduce the Decay to around 70ms, and the Sustain to zero. You should now hear an audible transient in your kick.

In addition to the fast pitch envelope, we can further alter the tone of our kick with a second, slower pitch envelope. Once again, we'll modulate the pitch by an octave, but we'll use envelope two with a slower Decay time of around 250ms.

Now it's time to add some additional harmonics to our relatively pure kick drum. Not only will this help the kick to cut through the mix on smaller speaker systems, but it will also help to fill out the frequency spectrum, thus making it sound bigger and fuller. In this case, we're using a combination of Ableton's Drum Buss and Saturator devices to give the kick a bit more bite.
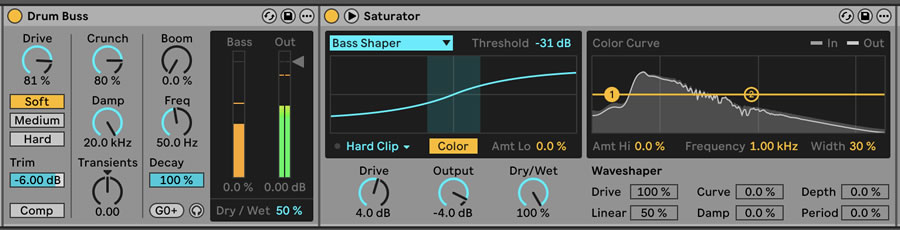
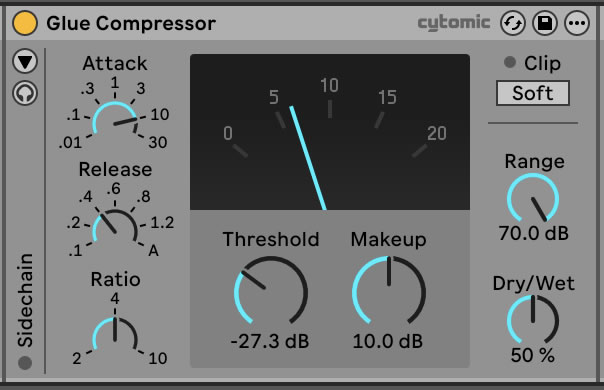
Finally, we've applied some aggressive glue compression to shape the contour of the sound and add some punch. We've used a relatively slow attack and a fast release, as this allows the initial transient through the compressor without clamping down on the body of the kick too much. We've applied around 10dB of gain reduction in parallel by reducing the Threshold and setting the compressor's Dry/Wet value to 50%.
How to Synthesise a Tom
Next up, we'll look at how to synthesize toms, as with just a few tweaks, we can turn the kick drum we've just synthesised into a Roland 909-style tom. Start by duplicating your kick track and renaming it TOM. We'll then transpose the sound up by eight semitones and draw in a basic MIDI pattern for our tom sounds.
Because the tom will play in a higher register than the kick, we don't need as much pitch envelope, so let's remove the fast pitch modulation in envelope two's lane, and turn envelope three's pitch modulation amount down to seven semitones. We'll also lengthen the amp envelope slightly, as toms can often ring out for longer than a kick drum without consuming too much headroom. We've set our amp decay and release to around 350ms. Depending on your tom pattern and project tempo, you may also want to engage Mono mode so that the oscillator voices don't overlap on subsequent notes.

Next, we'll introduce some noise to the tom to give it some vintage hardware flavour. There are many ways to accomplish this, including layering in some noise or applying some filtered distortion. We're going to use Ableton Live's Vocoder device, as it gives us plenty of flexibility over the sound.
Place Vocoder on the channel, engage Enhance mode, and set the Bands to 16. You should now hear a deep, noisy sound which spans most of the frequency range. We only really want to introduce additional upper frequencies, so let's can click and drag a shape in the filter bank to achieve this. Now dial back the Dry/Wet amount to blend the dry sound back in with the additional noise.

We've further refined our tom sound by adding some more noise and drive, cutting the sub frequencies, and slightly boosting the fundamental frequency.
How to Synthesise a Clap
With our low-frequency drums taken care of, let's move on to creating our own claps from scratch. There are many styles of clap, from natural hand claps to the noise-based claps heard on drum machines. Here, we'll create a clap which is inspired by the popular Roland 909 drum machine. We'll use noise to create our clap, so choose a synthesiser with a built-in noise oscillator. Ableton Live's Operator is suitable for this, with oscillator A set to Noise White.
Set the amp attack to 0ms, the sustain to full, and the release to around 600ms. You should now hear a single burst of noise when triggering your clap, but when you look a little closer at most clap samples, you'll notice that there are actually multiple peaks which sound one after the other.

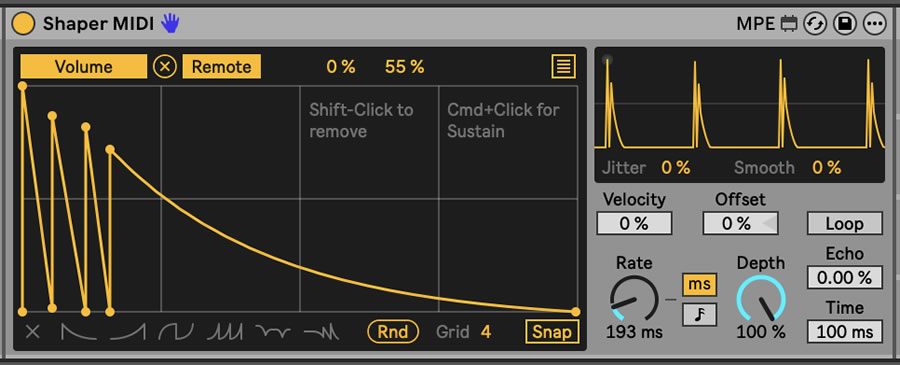
We can achieve this effect using very fast modulation. If you're using an advanced synth like Serum or Vital, you can draw in a similar shape with an LFO. Alternatively, you can use an external modulation source, such as the Shaper MIDI device in Ableton Live.
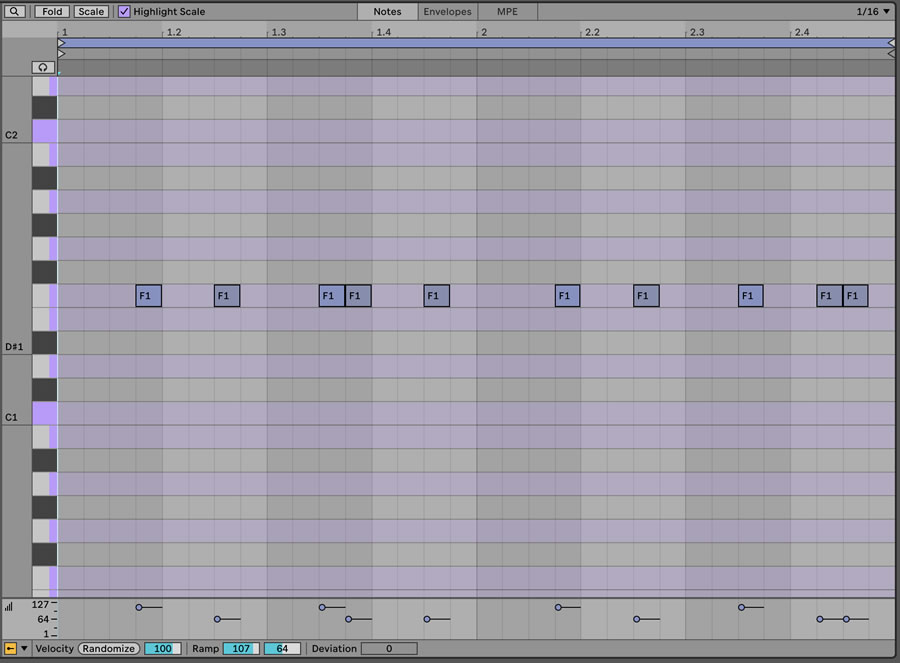
Draw the approximate shape of a clap's waveform, with three shorter bursts of sound and one longer burst, which will be the clap's tail. Assign the modulation to the oscillator level. We can see from the example clap's waveform that the total length of the clap is around 200ms, although you can experiment with the modulation shape and rate to find a sweet spot.
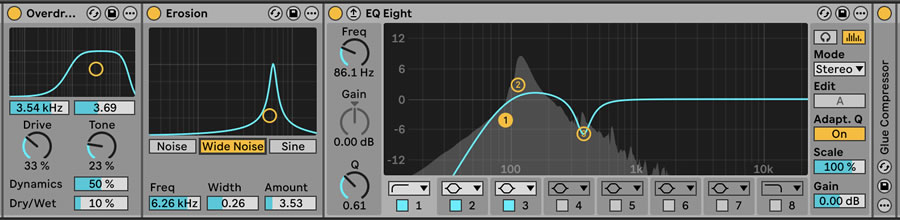
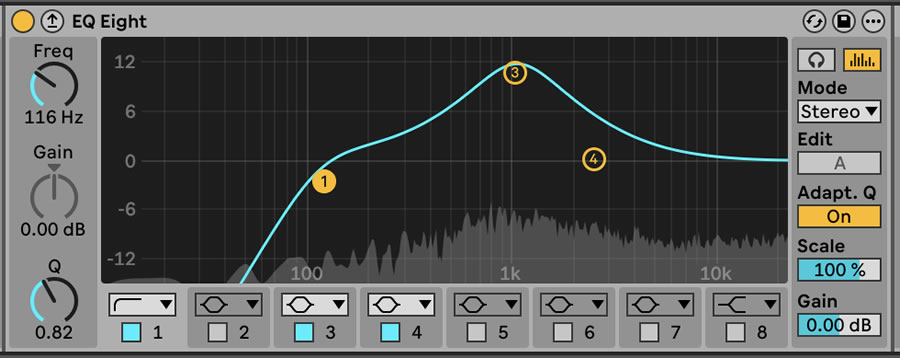
In terms of volume contour, your sound should now resemble a clap. Now, we can spend some time refining the overall character and tone of the clap. A traditional Roland 909 clap has plenty of frequency information around 1kHz, so let's boost that range quite aggressively using an EQ. We've also rolled off some unnecessary information below 100Hz using the same EQ device.
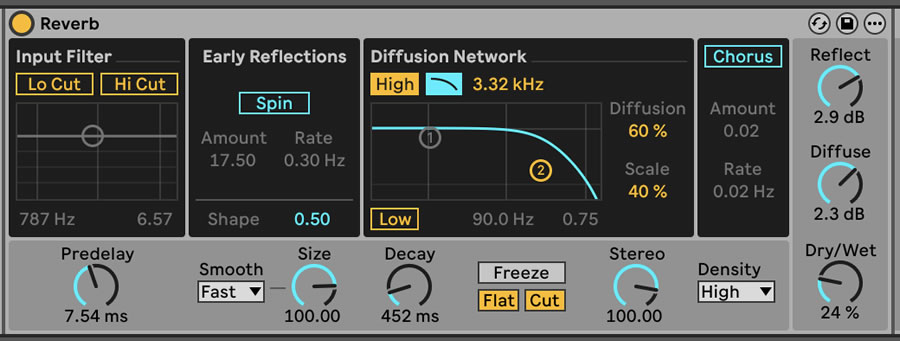
Let's add a short stereo reverb to make the clap sound slightly wider and more natural. We've rolled off some of the reverb's high frequencies and brought the Dry/Wet right down to around 22%. While this gives us a very subtle reverb, the clap sounds extremely dry and unnatural without it.
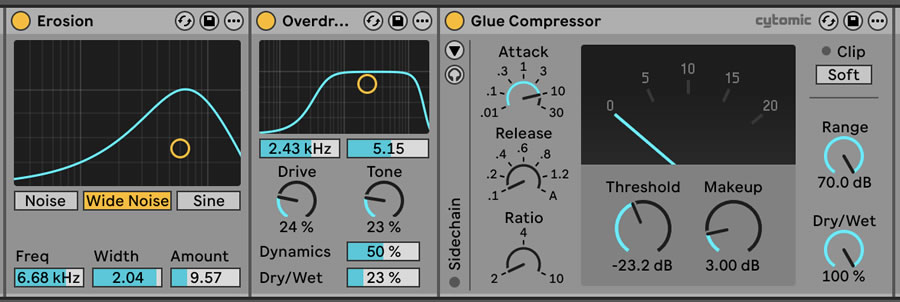
Finally, we've added some Erosion and Overdrive to give the clap some more character, followed by a Glue Compressor with a slow attack to gel the entire sound together and emphasise the transient.
Now that we've synthesised those three elements from scratch, let's hear how they sound within the context of a full drum beat. We've added the HPH_124_Slack_Hats hi-hat loop from Hyper's Hip House pack.
If you're looking for drum sample inspiration or just want to reinforce your sample catalogue, check out our extensive catalogue of high-quality, production-ready samples.
