


There is an ongoing debate around digital vs analogue when it comes to music production and audio fidelity. On the one hand, digital audio is more reliable, consistent and practical. On the other, analogue audio is considered by some to have unique sonic characteristics that can’t be emulated in the digital domain.
In this article, we’ll identify some of the audible differences between analogue and digital audio. We’ll also suggest some ways to simulate the sound of analogue audio within your DAW, giving you the ease of use of digital audio, along with the tone and character of analogue audio.
What are the differences between analogue and digital audio?
Before we start to make our digital audio sound more analogue, we first need to identify some of the characteristics that set the two sound processing mediums apart.
Frequency content and tone
It wasn’t until the 70s that sampling took on a more similar format to how we know the practice today. The Fairlight CMI is widely believed to be the first piece of sampling equipment, and allowed the user to record short sounds then play them back along a keyboard.
Imperfections
Because digital audio is constructed with binary code, it is extremely reliable and consistent. While that could be seen as a positive, the subtle movement and imperfections inherent in analogue equipment give it interest and a unique character. Gentle variation in a signal’s volume, pitch, filter cutoff or stereo width can make a signal sound more analogue.
Noise and interference
As with imperfections, digital signals are less likely to contain noise and interference than analogue equipment. Once again, this could be a desirable attribute, but introducing some noise to a digital signal can help to give it some unique texture.
Dynamic range
The term dynamic range describes the difference between the quietest and loudest parts of a signal. Digital audio tends to have a higher dynamic range than analogue equipment. This is another sonic characteristic that we can alter when trying to make our digital signal sound more analogue.
How to give your productions an analogue feel
Now we’ve got an idea of what sets analogue audio apart from digital, we can start to apply some of those principles to a project within our DAW. We’ve written a drum pattern using a range of loops and one-shots from Sample Market, which all work well together as a cohesive group of elements. But when we start to add melodic elements using digital synthesis, those elements stick out as being extremely digital and sterile.
Use simple waveforms
Modern wavetable and FM synthesis is highly versatile and has enabled us to create just about any sound you can think of. But vintage analogue synths aren’t capable of these forms of synthesis in their traditional sense.

An easy way to make your track sound more analogue is to only use sounds that can be made by traditional subtractive analogue synths. This means using simple waveforms such as sine, triangle, saw and square waves. In our example, we’ve changed our lead’s complex oscillator to a simple square wave.
Add movement and variation
Our current lead sound is still very precise and consistent. We can change that by introducing some variation to various parameters within the synth. We’re using Ableton Live’s Wavetable synth, but this technique is possible in any synths with inbuilt modulation options.
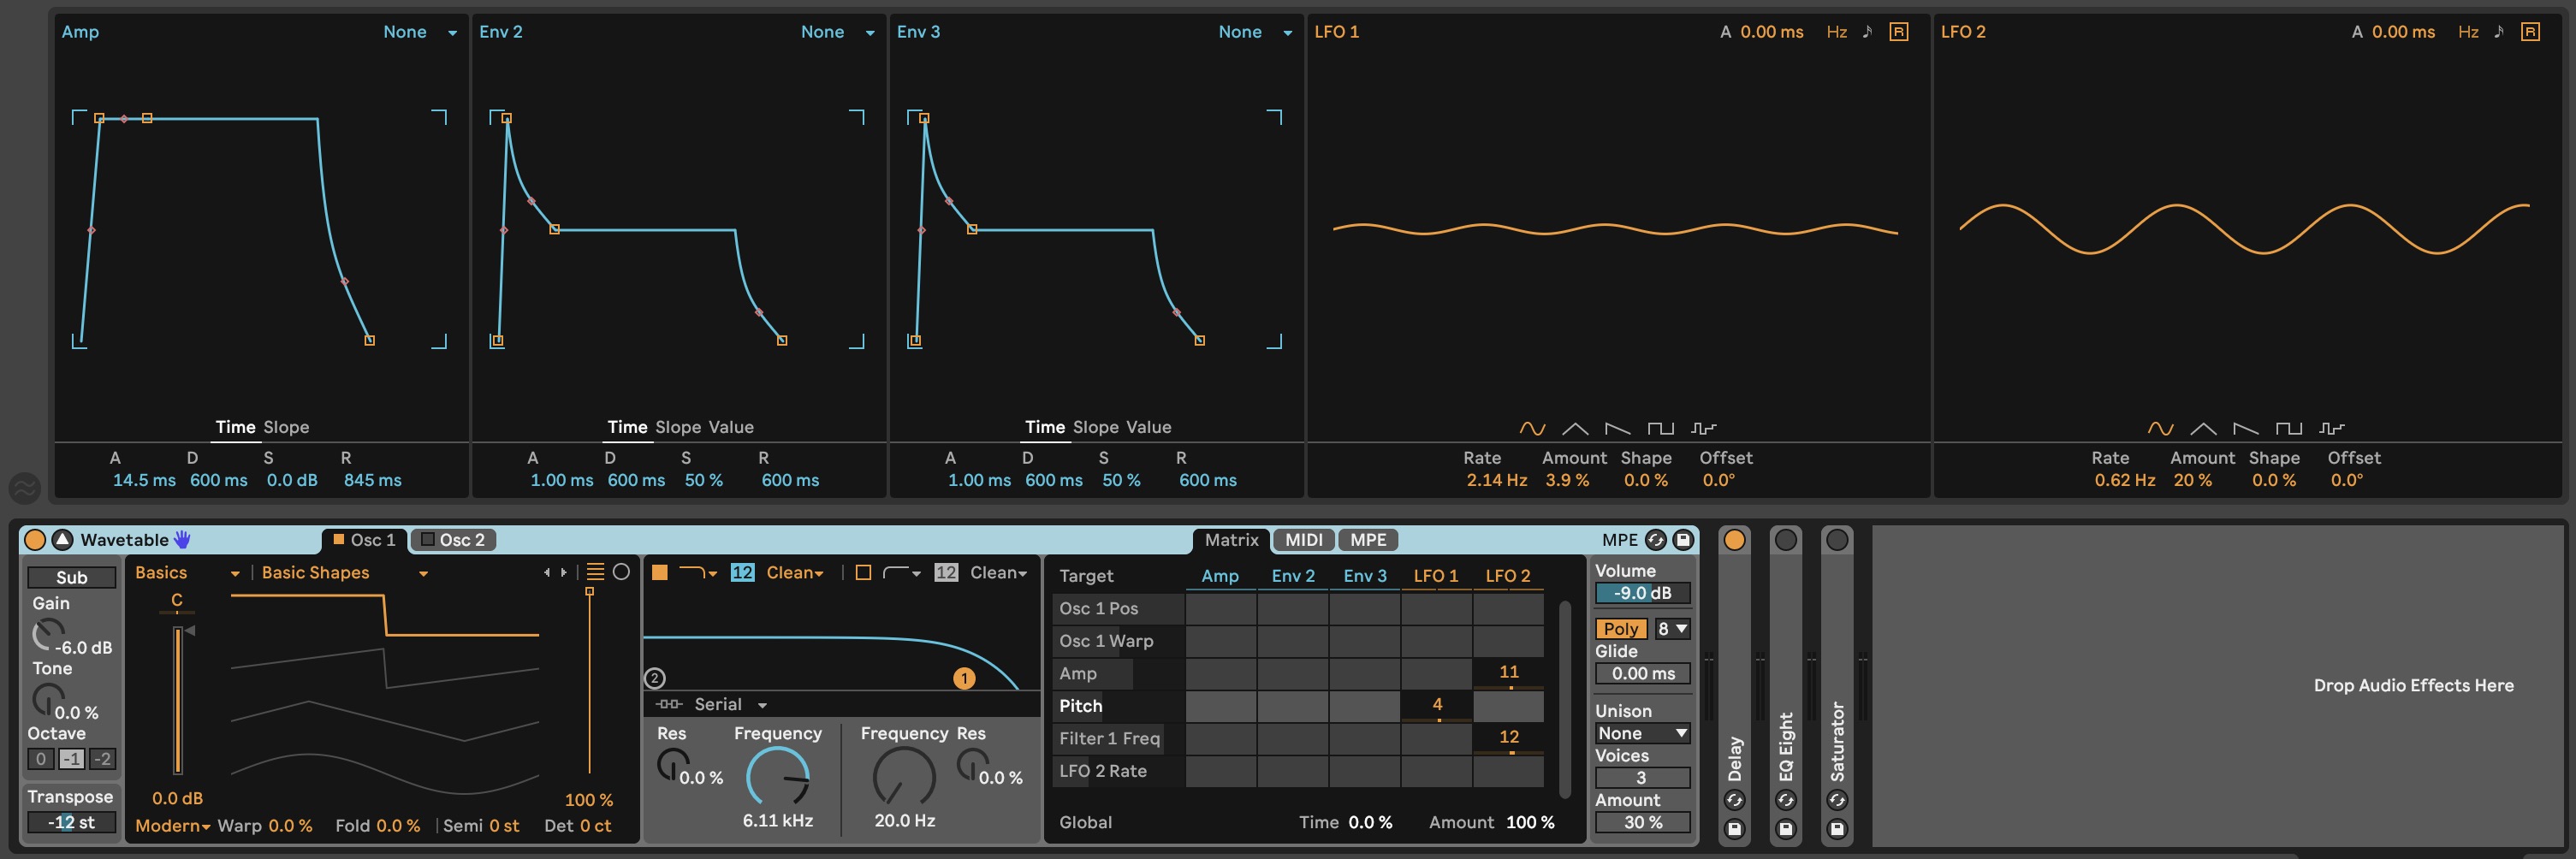
With LFOs one and two set to unsynced mode with Retriggering turned off, we’ve gently modulated the Oscillator Pitch, Filter Cutoff and Amplitude amount to give the synth some movement.
Control digital harshness with a filter
While the square wave does sound less obviously digital, it’s still very bright and piercing. Let’s roll off some of the high-end using our synth’s inbuilt low-pass filter.

If you prefer, you can use an EQ to control some of your digital signals’ harshness, but we’ve opted for a filter for a reason that we’ll explain shortly.
Add warmth with EQ
As well as attenuating the high frequencies of our signal, we can also accentuate some of the lower frequencies in order to emulate the tone of analogue equipment. The precise area to boost will depend on your source signal and the rest of your mix, but start at around 100Hz and see how it affects your signal.
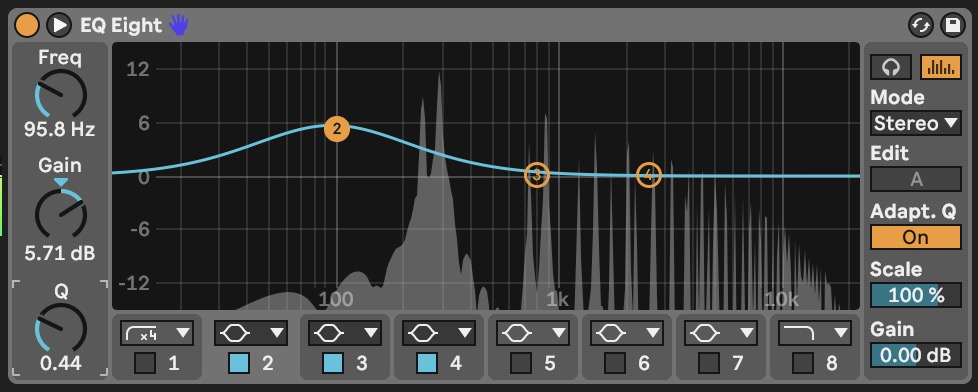
Using a bell curve with a medium Q value, we’ve boosted our signal by nearly 6dB at around 95Hz.
Add warmth with saturation
Equalisation isn’t the only way to add warmth to your productions. You can use saturation too. Saturating a signal does two things, both of which can make it sound more analogue. Firstly, it adds harmonic content to the signal, making it sound rounder and fuller. Secondly, it compresses the signal thus reducing its dynamic range.
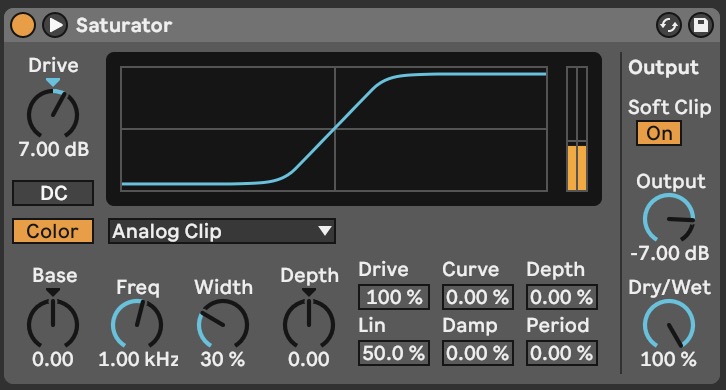
There are hundreds of saturation plugins out there, some of which model very specific pieces of classic hardware equipment, while others offer a modern solution to saturation. Using Ableton Live’s Saturator device in Analog Clip Mode, we’re adding around 7dB of Drive to our lead sound, while compensating for that with -7dB of gain.
Add noise
Analogue circuitry can be noisy, especially on old equipment that has had a hard life. At the dawn of digital synthesis, a huge selling point for the new technology was the clear and transparent signal that it promised. But being the fickle group of people that we are, some of us music producers long for the previously unwanted electrical noise of analogue gear.
Using an additional synth, an extra oscillator or even a sampler, we can layer our square wave with some noise to give it a dirty and imperfect analogue vibe. You could use a white or pink noise generator in your synth, or load a random texture or foley sample into a sampler.

We’ve loaded the BE_Smash_FX sample from the Hyper Breaks and Electronica sample pack, as it contains some noise as well as some tonal content. We’ve slightly tuned it to work better with the synth’s key, and adjusted the Attack and Release parameters to fit with the contour of the synth nicely.
Avoid modern synthesis processes
Earlier on, we changed our oscillator from a complex shape to a basic square wave in order to ensure our style of synthesis remains true to vintage analogue synthesis methods. In a similar vein, we should avoid using any advanced synthesis features that might give our sound too much of a modern aesthetic.

In our original bass sound, we’ve used Wavetable’s Phase Sync Unison modes to give it some stereo width without affecting mono compatibility. While it does sound good, Unison isn’t a feature that was prevalent on traditional analogue synthesisers, so turning unison off is likely to give us a more analogue sound.
Apply buss processing
Back in the days before digital audio, music was recorded, mixed and mastered exclusively with analogue equipment. Whether desirable or not, analog equipment imparts its natural tone and character on the signal, often applying saturation which results in a more harmonically rich and dynamically compressed sound. This has the effect of gelling the buss or master together into more of a single cohesive entity.
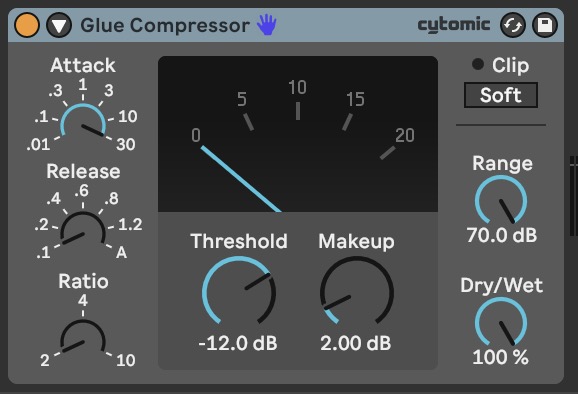
We can emulate this effect with buss processing, which refers to any processing being applied to a buss. Common tools include EQ, saturation or compression. Glue compression is frequently used on a drum or mix buss to do just that - glue the mix together. Ableton’s Glue Compressor is modelled on the infamous SSL 4000 G-Master Bus Compressor which resulted in the invention of the glue compression trick.
Set the compressor’s Ratio to 2:1, the Attack time as slow as possible and the Release time as fast as possible. Then bring down the Threshold value until the compressor is applying 2dB to 3dB of gain reduction. While the effect is subtle, it creates a sense of cohesion within the mix.
We can also emulate the sound of old analogue equipment with tube or tape-style saturation. An advanced saturation plugin like FabFilter Saturn 2 packs a few different saturation styles, but we can get similar results with Ableton’s inbuilt devices.
The Dynamic Tube device not only lets you select from three different tube saturation algorithms, it also features an envelope shaper so you can control how the saturation responds to your signal. This is particularly useful for adding saturation to drum transients.
By placing Dynamic Tube on our drum buss, increasing the drive to around 5dB and reducing the Attack and Release times, we are applying transient-dependant tube-style saturation to our drums.
You can apply the techniques identified here to give your sterile, digital tracks a bit more of an analogue vibe. You can also get creative with your own processing tricks, by considering some of analogue audio’s technical characteristics that we explored at the start of this article.
