


Rhythm isn't all about drums. Learn how to make unique rhythmic textures that add interest and groove to your productions.
We've previously written about creating generative drum patterns with MIDI effects, as well as creating lush pads with any sample. In this article, we'll be taking some of the concepts covered in those articles a step further, and suggesting some ways in which you can generate your own rhythmic textures in Ableton Live.

This tutorial is designed to demonstrate some ways in which you can use Ableton Live to generate new sounds and ideas, and we encourage you to experiment with mixing and matching these techniques to come up with your own processes. Ultimately, it's all about experimenting with time-based effects like reverb and delay, and then shaping the outcome into a rhythm using gates, delays, and sidechain compression.
You'll need Ableton Live Suite if you want to follow along with this tutorial, but some of the general concepts can also be applied in other DAWs. If you want to download some fresh samples to spark new inspiration, or want to use some professionally-made rhythmic textures as a reference point, head to Sample Market to update your sample library now.
How to Generate Rhythmic Textures in Ableton Live
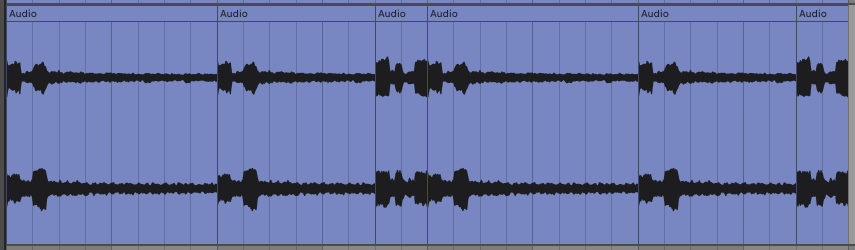
We've programmed a basic drum pattern using loops from Hyper's New Wave Tech pack, which you can hear below. Now it's time to add some more rhythm, texture, and excitement.
Delayed Gated Drums
We'll start with a simple technique that lets us add rhythmic texture to our drums. Find a simple drum loop that complements your existing drum pattern. We've chosen the NWT_129_Drum_No_Kick_08 loop from the same Hyper pack.
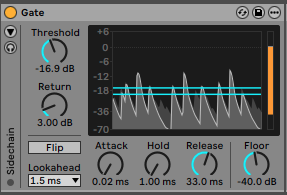
Next, add a Gate device, reduce the Attack and Hold values, then reduce the Threshold until only the loudest drum hits pass through the gate. Now, set the Release time until the decay sounds natural.
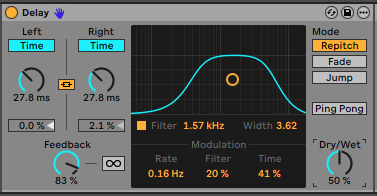
Next, add a Delay device and engage Time and Ping Pong modes. Reduce the Time to somewhere between 10ms to 20ms, then increase the Feedback amount. We want to create a kind of slapback delay with a long tail. We can now introduce some movement by increasing the Filter and Time modulation.
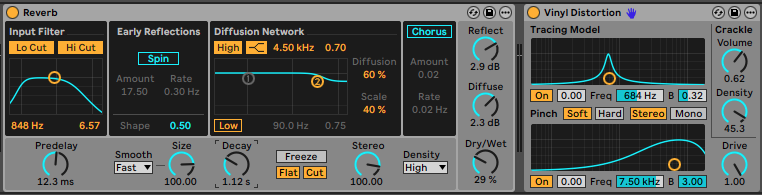
You should now have a morphing glitched drum delay sound with plenty of rhythm, but not much texture. There are countless ways to introduce some texture, but we've chosen to use a short reverb at around 30% wet, followed by the Vinyl Distortion device with the Volume and Density levels turned up.
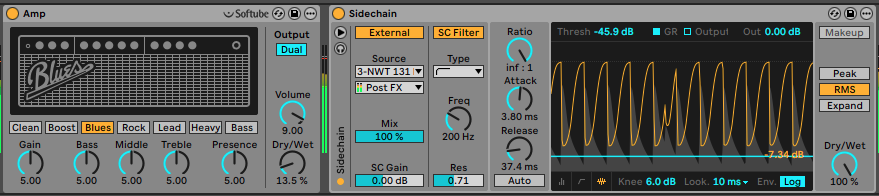
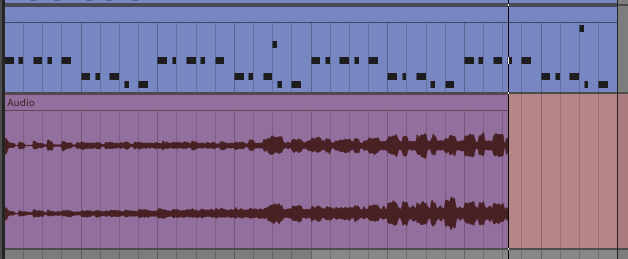
We've then added an Amp device in Dual Output mode with the Dry/Wet at around 15%, as this helps to emphasise some of the upper harmonics of the signal. Finally, we've sidechain compressed the texture from the kick channel. This causes the audio to pump in time with our drum loop, and reinforces the rhythmic aspect of the texture.
You can hear how the rhythmic pumping texture fits within the context of the rest of the drums.
Resample Delayed Synth Plucks
This time, we're going to create a rhythmic texture using a tonal element rather than drums. In this case, we'll use some organ-style chords which were made using Ableton Live's Operator device.
We've placed an Auto Filter on the channel and set it to DJ mode. This allows us to quickly morph between high and low-pass filters as we adjust the filter amount, all from a single control. We've then placed an Echo device after the filter.

At this stage, try experimenting with the filter's Control value, along with the Echo's Feedback, Dry/Wet, and time controls. You'll notice that you can achieve a wide range of sounds and textures that remain in sync with the rest of the track, particularly when you increase the Feedback value beyond 100%. We're now going to resample the chord channel's output onto a new audio channel as we play with these parameters.
Now, you can edit and arrange the resampled audio to work with your composition. In this case, we've arranged various sections of the feedback loop and added a synced phaser to add to the rhythmic feel of the texture. As before, we've used sidechain compression to give the texture a more rhythmic feel.
Once again, hear how the sidechain compression helps to gel the audio with the drums.
Resample Drums then Gate for Glitchy Rhythmic Textures
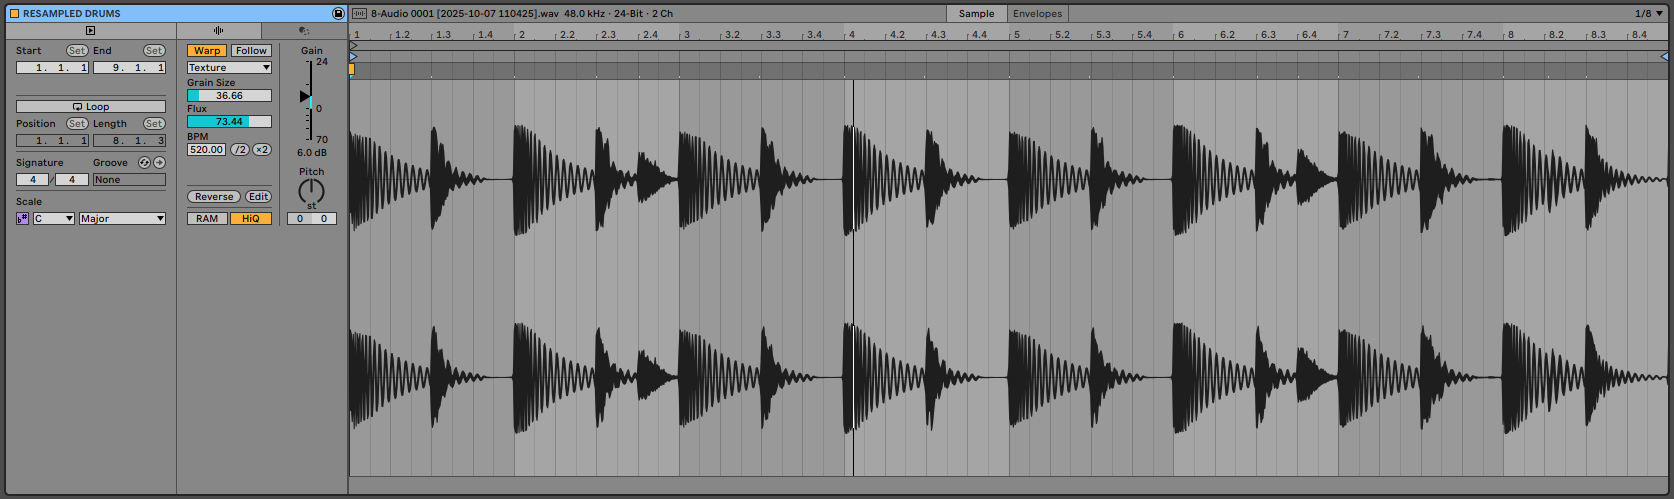
Now, let's recycle our basic drum loop and transform it into a gated glitchy texture. Start by resampling two bars of your drum mix onto a new audio channel.

Double-click on the audio clip and ensure Warp mode is engaged, then click on the x2 button twice to quarter the original tempo of the clip. This essentially stretches the audio out to four times its original length, and when combined with Ableton Live's various Warp modes, can create some really unique results. Here, we've messed with the Grain Size and Flux within the Texture Warp mode.
Let's add further glitchiness with Live's Beat Repeat device. It doesn't have to sound particularly rhythmic at this stage, as we're going to reintroduce some more controlled rhythm with a synced delay and an Auto Pan device.
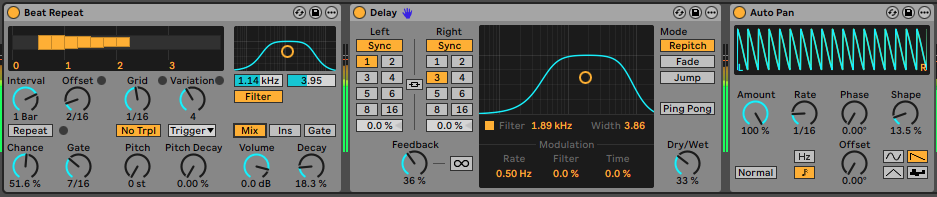
To introduce more rhythmic movement, add an Auto Filter, set the filter mode to Band-pass, and add some synced modulation with the built-in LFO. We've also increased the filter Res and Drive amounts to taste. To add even more movement, we've applied some synced pitch modulation using Ableton Live's Shifter device.

At this stage, if you're happy with how your rhythmic texture sounds, you can leave it as an ever-evolving loop. Alternatively, you can resample it onto a new track, create edits, and rearrange the sections in a way that works for your production.
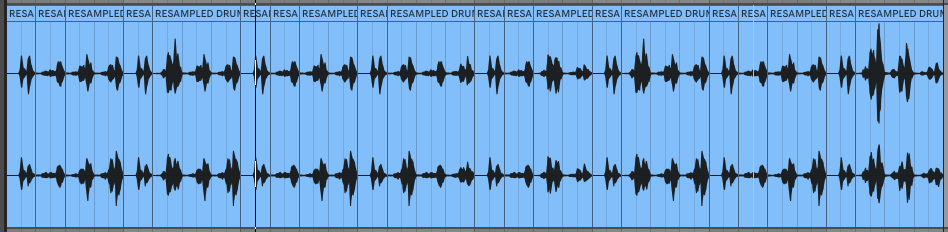
Either way, the final step is to sidechain compress the texture from your kick drum.
Metallic Rhythmic Texture with Spectral Resonator
Finally, we're going to turn some simple hi-hats into a rhythmic texture using Ableton Live's Spectral Resonator device. You can either program your own hi-hats or use a hi-hat loop, as long as your loop contains shorter closed hi-hats, as they work best for this technique.
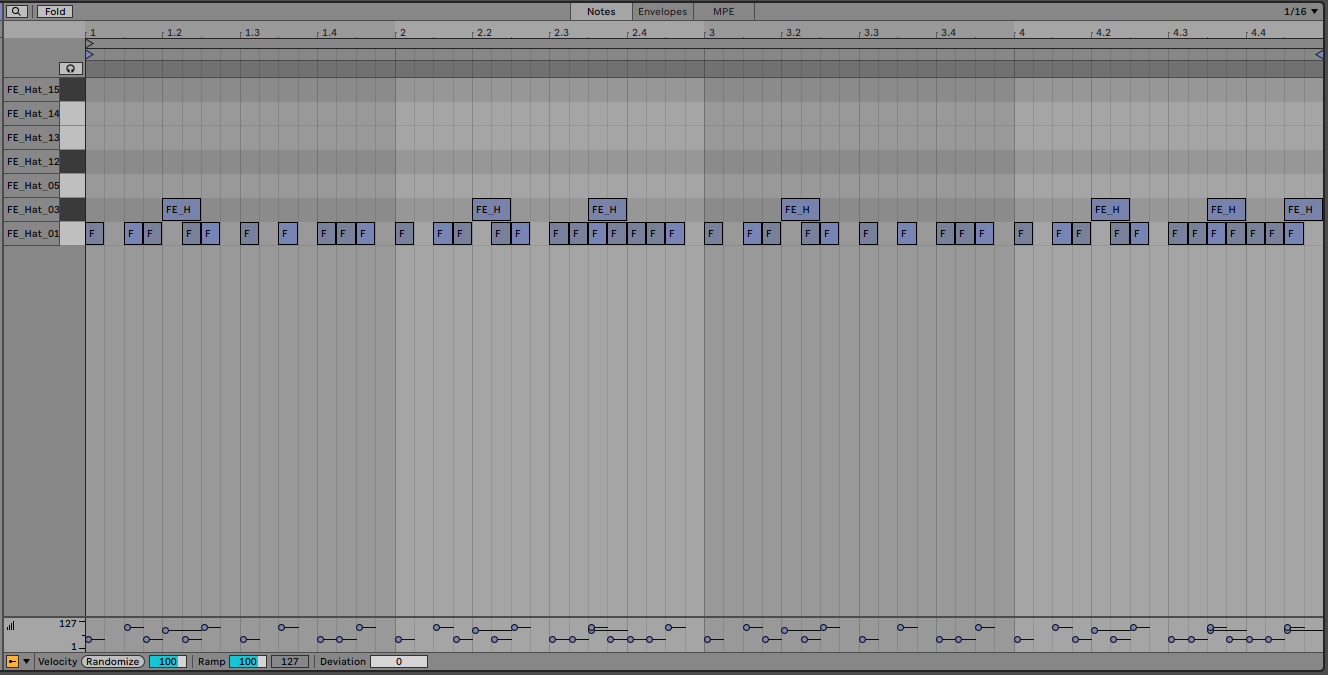
Once you've got a hi-hat loop that complements the rhythm of your basic drum pattern, add a Spectral Resonator to the channel. We want to stay within the key of our project, which in this case is A# Minor, so switch Spectral Resonator from Hertz to MIDI mode, and select the root note of your key. We're also going to engage Chorus and Unison mode, as this adds some interesting movement and stereo width.
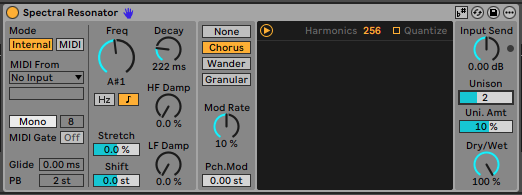
Increase the Decay time to give the spectral resonance a longer tail. At this point, the effect probably sounds quite harsh and overly digital. We can tame this by increasing the HF Damp amount. We can also reduce the Freq or Shift amount by an octave to achieve a deeper tone.
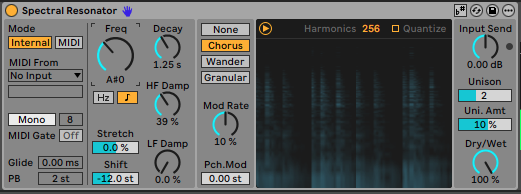
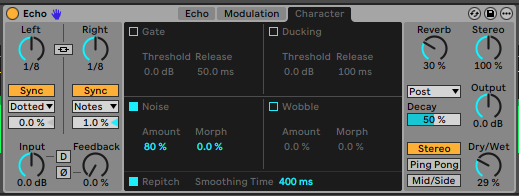
Next up, we want to add some more texture to our sound. Ableton Live's Echo device is ideal for this task, as it gives us plenty of control over the space and tone of our signal. We're going to use Echo's Delay, Reverb and Noise sections to give our sound more rhythm and texture.
Start by unlinking the two delays, then setting one of the delays to Dotted and the other to Notes. This gives us a unique stereo syncopation effect. We're also controlling the delay by reducing the Feedback and Dry/Wet amounts, and applying some filtering to refine the delay's tone.
Set the Reverb amount to around 30% to add some more space, then open the Character tab. Turn on the Noise section and set the Amount to around 80%. This adds a subtle texture that simulates the noise of vintage audio equipment. As before, we've sidechain compressed the signal from our kick drum to tie the rhythm in with the rest of our track.
You can hear the final audio example within the context of the drum pattern below.
As you can see, there are unlimited ways to generate your own rhythmic textures using the tools in Ableton Live. Start by creating a texture, then figure out how you can encourage it to follow the rhythm of the rest of your track. Don't be afraid to experiment with different effects or extreme processing. Record the output and listen out for little moments of sonic gold that you can repurpose in your next project.
Whether you're looking for samples to create your own rhythmic textures with, or just want to find some production-ready textures, don't forget to check out the growing catalogue of high-quality samples on the Sample Market store.
