


Stuck for inspiration? Try out these six techniques for creating generative drum patterns with MIDI effects.
We’ve previously written about manually programming more groovy drums, but what if you want to use the power of MIDI to generate unique and interesting drum sequences that evolve over time? In this article, we’re going to explain what generative drum patterns are, and how you can start using them to add excitement and unpredictability to your productions.
We’ll be using Ableton Live Suite 12 in this article, as there are a number of MIDI tools and features that make it the ideal DAW for generative music. Some of the techniques covered are possible with other DAWs or third-party plugins, but some are specific to the latest version of Ableton Live.

To put these techniques into practice, we’re using some professional one-shot drum samples and loops from Hyper’s Hip House and New Wave Tech sample packs. For other genres, head to the Sample Market store to browse the extensive range of release-ready sample packs from your favourite artists and labels.
What are Generative Patterns in Music Production?
Within the context of music production, generative refers to audio that is created (or generated) by a system as opposed to being manually programmed by an individual. Generative systems can add a level of chance, randomisation and probability, so generative music often changes over time and can be highly unpredictable.
Generative drum patterns can be sequenced by different types of MIDI-based systems, including modulators, sequencers, randomisers, arpeggiators and much more. The use of generative drum patterns can help to bring excitement, movement and variation to your productions with minimal input from the user. For this reason, it’s a popular technique within genres such as House and Techno that tend to morph and evolve over time.
How to Use MIDI Effects to Create Generative Drum Patterns
Now that we’ve explained what generative drum patterns are and what kind of tools are used to create them, let’s explore some techniques in more detail.
1. Using Modulation to Trigger Different Drum Samples
We’re starting off with a simple generative technique which involves using an LFO to change the drum sample being played. This works particularly well on mid and high-frequency drum sounds such as percussion and hi-hats, and can be used to add an interesting layer to your drums or even to program entire drum sequences.
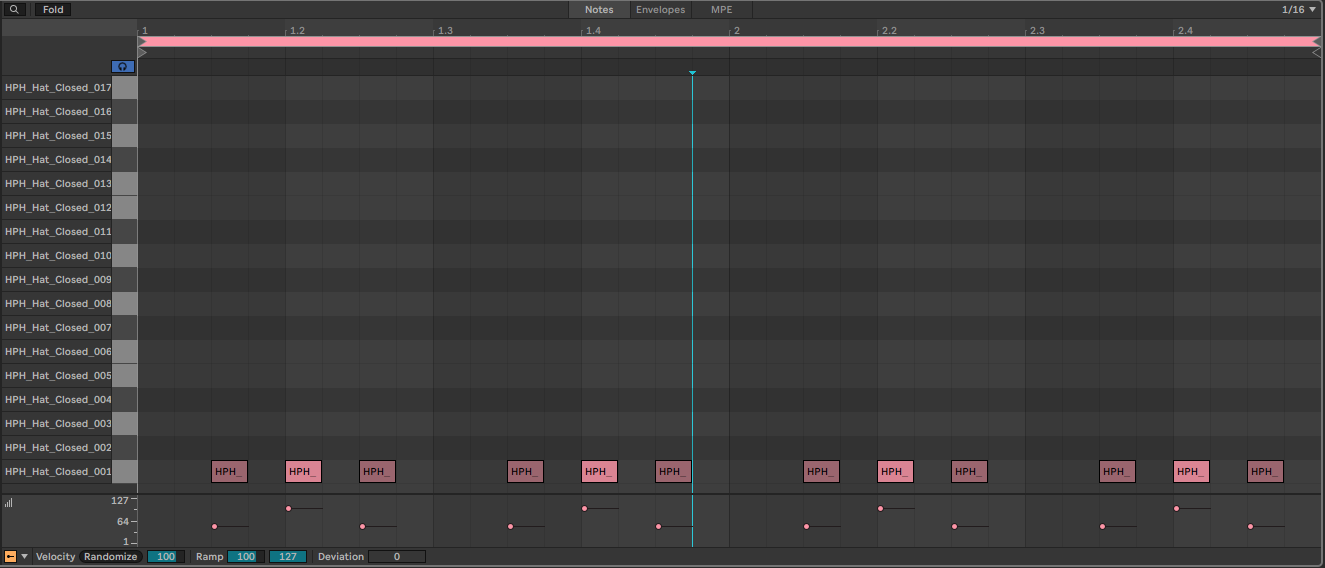
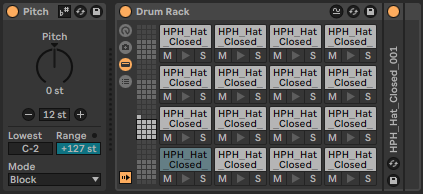
We’ve started by selecting a handful of closed hi-hat samples and loading them into a Drum Rack, but you can use any MIDI-based drum instrument. We’ve then drawn in a simple closed hi-hat MIDI pattern with a single note, as we’ll be using a modulation source to vary the MIDI note being played. To do that, we first need to add a Pitch control before the Drum Rack.
Now it’s time to add the modulation. You can use any modulation source you like, and Ableton Live offers plenty of options including LFOs, shapers, randomisers and more. We’re using an LFO to modulate the Pitch control in the Pitch device. This modulates the notes being received by Drum Rack, which therefore plays different drums throughout the sequence.
Try syncing the LFO for more rhythmic and predictable generative hi-hat sequences, or you can create more unpredictable sequences with unsynced LFOs. You can then use the LFO’s modulation controls to configure which notes are played.
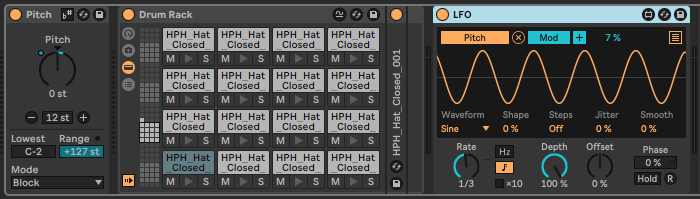
Try experimenting with different modulation rates and amounts, as well as modulation shapes. With some trial and error, you’ll find some happy accidents where the generative drums fit nicely within your project.
2. Using an Arpeggiator
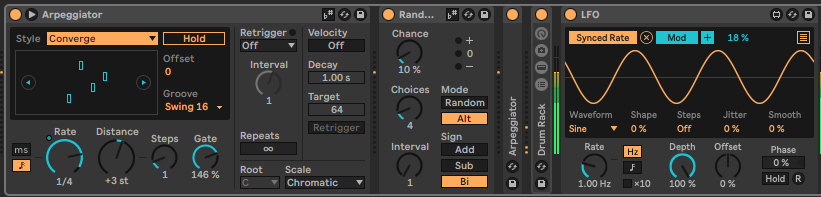
We can achieve the same technique as above using an arpeggiator. We’re using Ableton Live’s stock Arpeggiator device, but there are plenty of other MIDI arpeggiators available that work with any DAW.
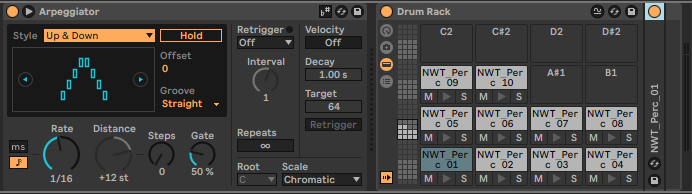
The principle is the same; use a MIDI device to trigger different notes and therefore create different patterns. The advantage to using an arpeggiator over an LFO is that it may grant more control over the notes being played. For example, if we don’t want a particular drum hit to play at a certain point, we can ensure there is no MIDI note playing at that time.
Experimenting with the Style control will generate different drum sequences, with most Styles generating predictable patterns whereby the drums will be triggered in the same order every time. For more unpredictability, try using one of the Random styles.
3. Use a Random Note Device to Add Subtle Variation
If you want to add some element of unpredictability to your generative drum patterns but don’t want a completely random drum pattern with no repetition, you can use Ableton Live’s Random device to add subtle deviations from the core drum pattern.
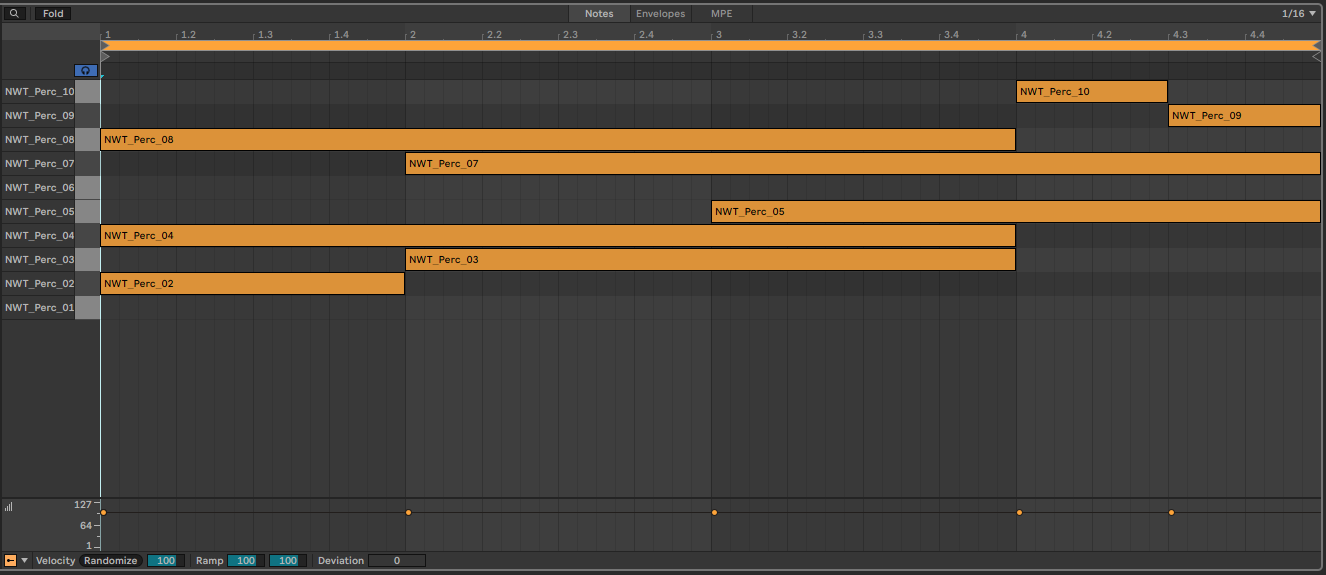
For example, we’ve used the Up & Down arpeggio Style to create a percussion pattern we like, but it gets a bit repetitive after a few loops. The Random Styles create far too much variation for this use case, so we just want to add some subtle variation. We’ve placed the Random device between the Arpeggiator and our Drum Rack, and increased the Chance value to around 10%.

This means that 10% of the notes that enter the Random device will be adjusted according to the other parameters within Random. Lower Choices and Interval values result in smaller adjustments, and you can use the Sign settings to choose whether the device increases and/or decreases the note value.
4. Using a Generative MIDI Sequencer
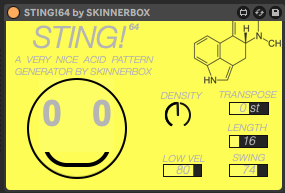
Rather than using a modulation source to trigger different MIDI notes, we can use a generative MIDI sequencer to randomly generate drum patterns. Simple generative sequencers like SKINNERBOX’s STING device will generate random patterns at the click of a button, with further controls for Density and Swing. STING was designed for creating Acid-flavoured basslines, but works equally as well on drums too.
If you want more control over your generative drum pattern, there are more in-depth sequencers available, such as the Mono Sequencer device that comes with the Max for Live Essentials pack. Like STING, Mono Sequencer has a random function, but it lets you randomise much more than just the notes being played. You also get a powerful step sequencer, so you can manually program the note, velocity, octave, and note duration.
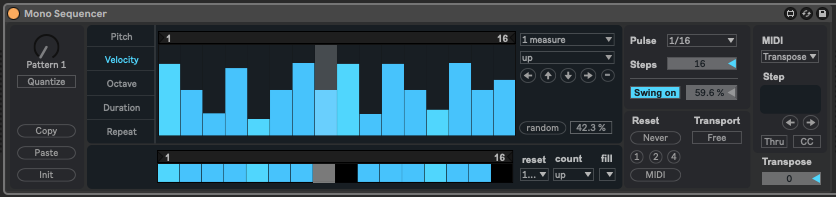
We’ve used Mono Sequencer to send MIDI into Ableton Live’s Simpler device, which we’ve set to Slice mode. This automatically slices a loop and lays it out across a piano roll, ready to be triggered in exciting new ways. We’ve loaded the HPH_124_Hinge_Break from Hyper’s Hip House pack into Simpler, and randomised the Pitch, Velocity and Octave lanes in Mono Sequencer until we found a drum sequence that fits our project.
5. Using Ableton Live 12’s Generative MIDI Tools
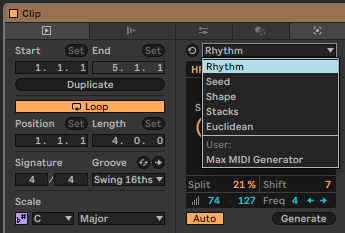
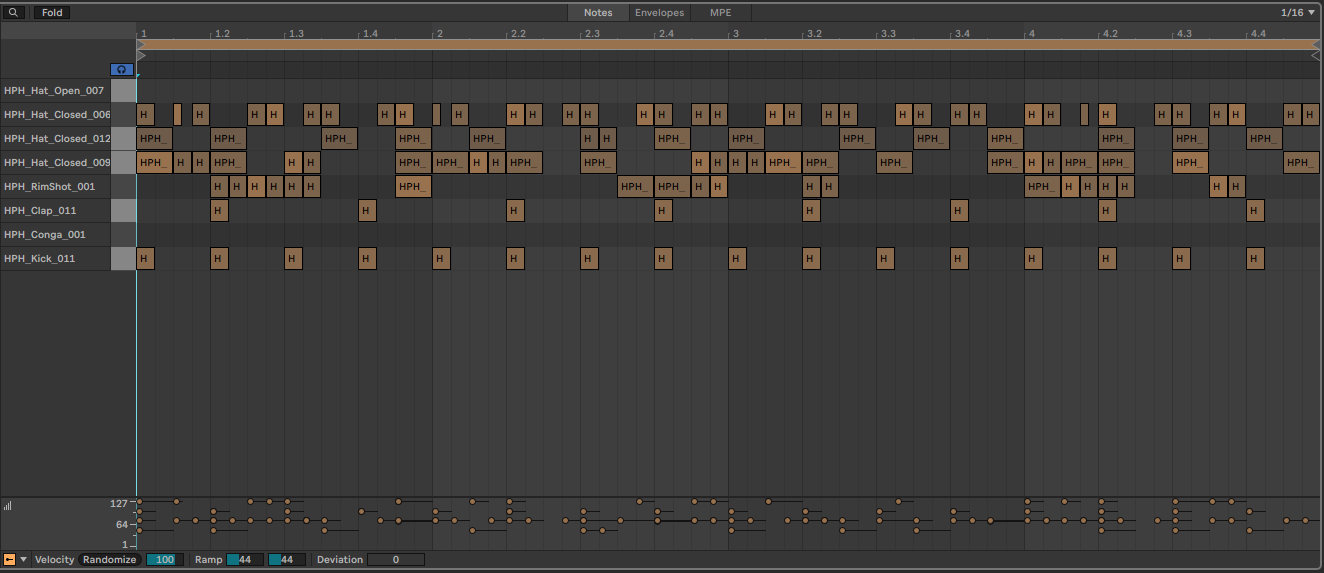
While most of the techniques in this article are possible in any DAW, this particular technique uses the new generative tools in Ableton Live 12’s MIDI Clip Editor. There are five tools to choose from, but in this example, we’ve selected the Rhythm tool by opening the Generative tab and selecting Rhythm from the drop down menu.
Once again, we’re using a Drum Rack which we’ve loaded with house samples from the same Hyper pack. Start by manually programming the core elements of your drums. As we’re making a House-influenced drum pattern, we’ve gone with a 4/4 kick pattern and a clap on the second and fourth beat. These parts will serve as the backbone of the track, as we add other elements around them with Ableton’s generative tools.
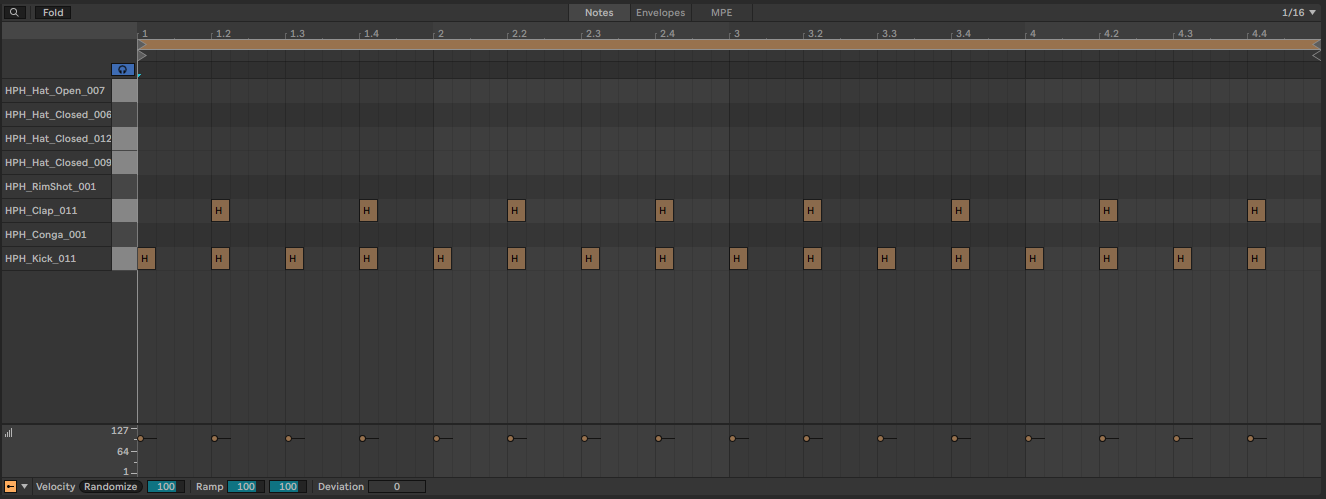
Select the drum part you want to program first by clicking on the corresponding note in the piano roll, or selecting it from the drop down menu in the generative section. With the Auto generate mode switched on, you will see MIDI notes appear as you adjust any of the parameters within the Generative section. Steps sets the number of steps in the pattern, while Density sets the number of notes within those steps. Pattern determines the actual pattern of the notes that is generated.
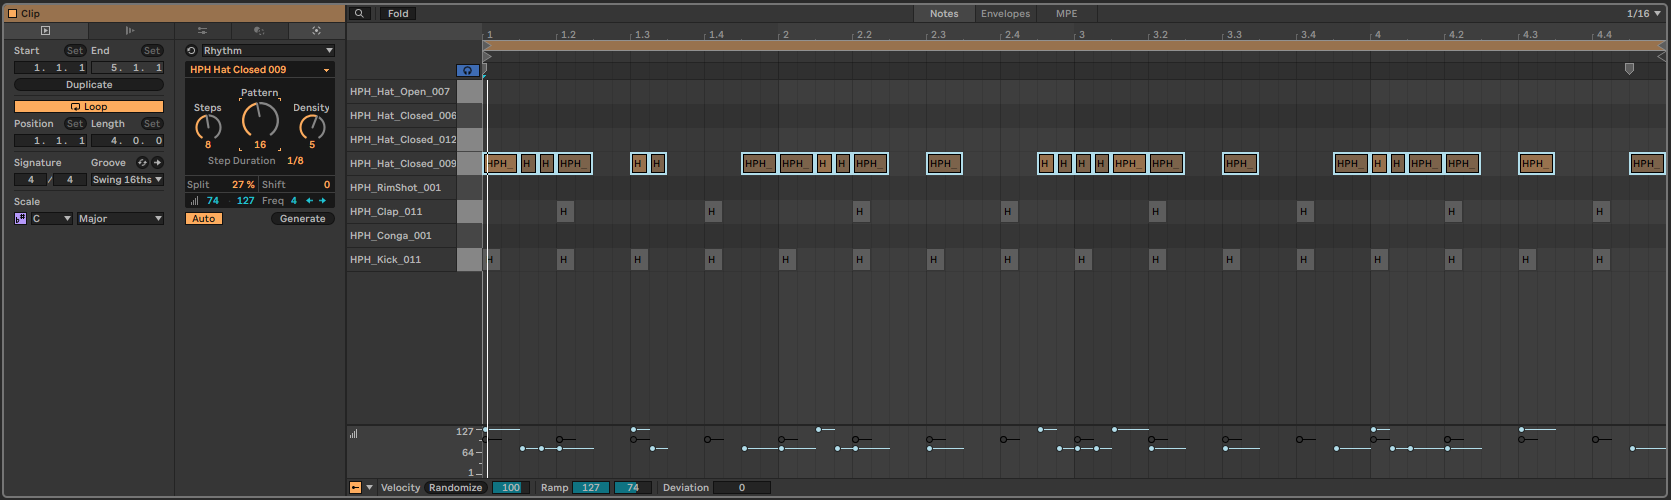
The Split control sets how likely it is that any given note will be split in two, and you can shift the pattern backwards and forwards using the Shift control. Once you’re happy with the pattern you’ve generated for the first drum part, you can move onto the next part and repeat the process. These new generative MIDI tools are a great way of finding instant inspiration with very little input, so if you’re feeling uninspired, try chucking a handful of samples into a Drum Rack and start generating.
6. Combine MIDI Effects for Even More Unpredictability
Finally, you can combine any of the generative MIDI effects above for truly infinite drum sequencing possibilities. Try using two arpeggiators in serial, each set to a different pattern and rate. Or modulating the parameters within your arpeggiator or sequencer to add some movement to your generative drum patterns.
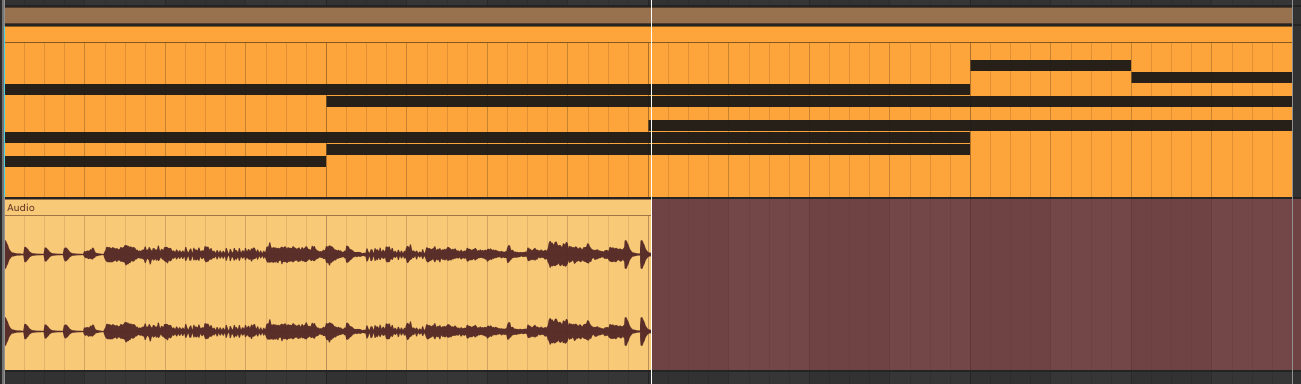
If things start to get out of control, you can use MIDI effects such as Ableton Live’s Scale or Velocity devices to set the boundaries within which your generative system will operate. Alternatively, to embrace the unpredictable and evolving nature of your new generative systems, try resampling their output to new audio tracks while experimenting with the parameters. This is a great way to create unique and exciting drum loops that you might not have thought of otherwise, and you can be sure that no one else has the same sounds.
If you need to freshen up your sample library with inspiring new samples, head to the Sample Market store to browse our latest sample packs across a range of genres, from House and Techno to UK Garage and Breakbeat.
