


Ever wondered how to recreate some of electronic music's most-loved sounds? We reconstruct three classic sounds with Ableton Live Meld.
Ableton Live's Meld is one of the prevalent DAW's newest native devices. The powerful bi-timbral synth was launched with Ableton Live 12, and packs a slew of features that make it a hugely versatile and inspiring instrument. In this article, we're going to demonstrate how you can recreate three classic electronic music sounds using Meld.
While there are plenty of classic electronic music samples on the market, creating your own gives you unprecedented control, and enables you to craft your own unique sounds that can be adjusted to your taste. If you want to follow along with the techniques in this article, you'll need a copy of Ableton Live 12 Suite in order to access Meld. If you use a different DAW, head to the Sample Market store to browse the huge selection of production-ready samples on offer.
How to Create an 808 with Meld
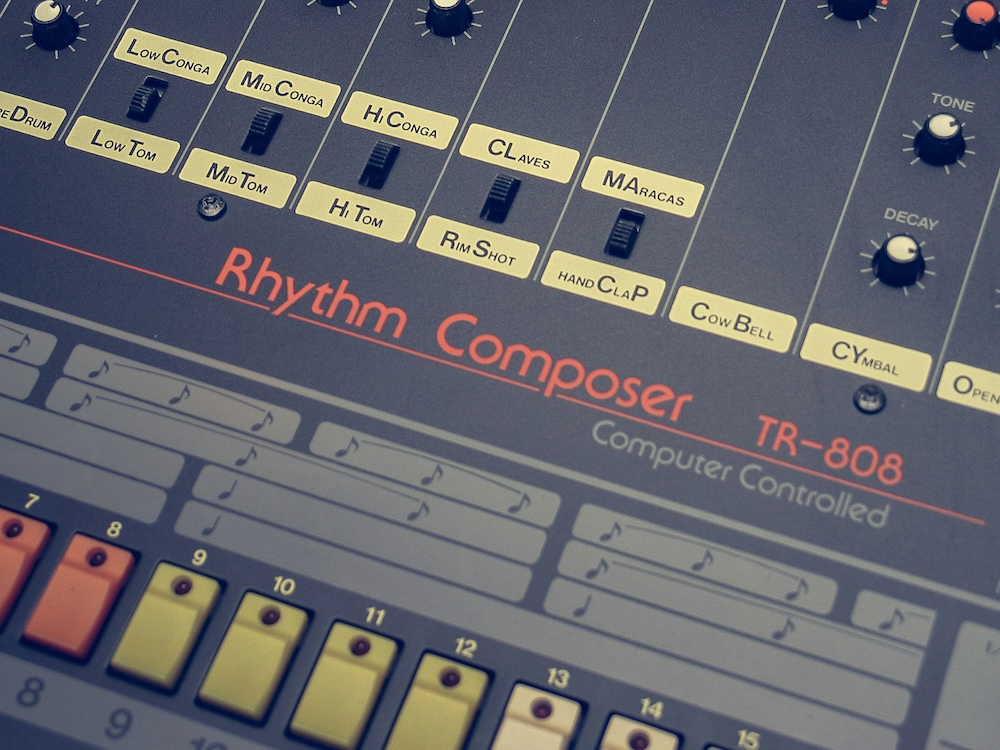
Let's kick things off (excuse the pun) with the most straightforward sound recreation in this article: the infamous 808. Technically, the 808 refers to the Roland TR-808 drum machine from the early 1980s. When we talk about the 808 today, we generally mean the deep, subby kick drum that was made popular by Hip Hop producers in the 90s. Today, an '808' can refer to anything from a classic subby kick drum to a huge distorted bass sound.
1. Oscillators
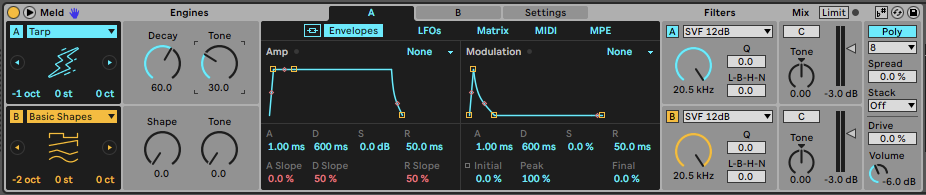
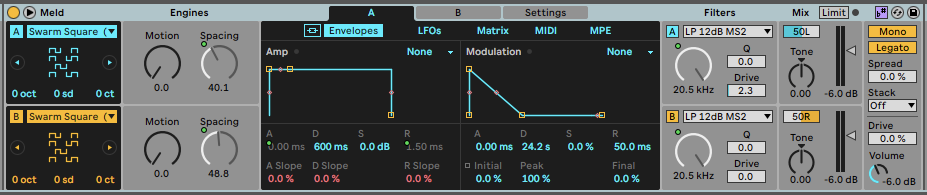
We'll be recreating an iteration of an 808 that sits somewhere between these two extremes, and of course, you can tweak it to your own taste. Start by loading an instance of Meld onto a new MIDI channel, set oscillator A to the Tarp type, and -1 octaves. The Tarp oscillator's Engines essentially control a pitch envelope, making it perfect for 808-style sounds. Set the Decay to 60, and the Tone to 30. You can leave oscillator B as the Basic Shapes type, but set the Octave to -2.
2. Envelopes
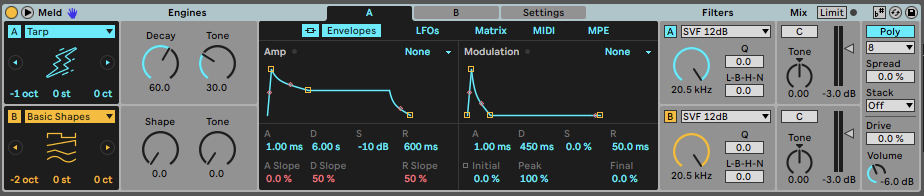
One of Meld's unique features is that each oscillator has its own dedicated envelopes. In this case, though, we want to link them by clicking the chain icon at the top left of the Envelopes section. Set the Amp Envelope's Decay to six seconds, the Sustain to -10dB, and the Release to 600ms. Then tighten up the Modulation Envelope by reducing the Decay to 450ms.
3. Filters
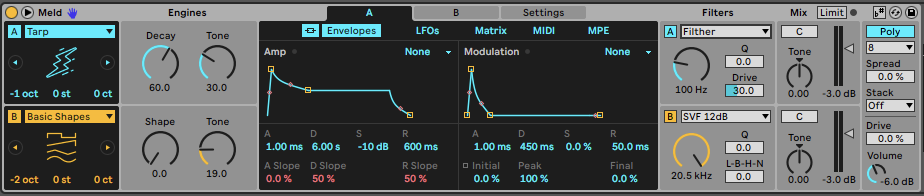
Another of Meld's unique features is its choice of Filters, which each have different sonic characteristics and Engines controls. We'll set oscillator A's filter to the Filther type due to its pre and post-distortion circuits and dedicated Drive control. Reduce the Cutoff to 100Hz and set the drive to 30.
4. Modulation
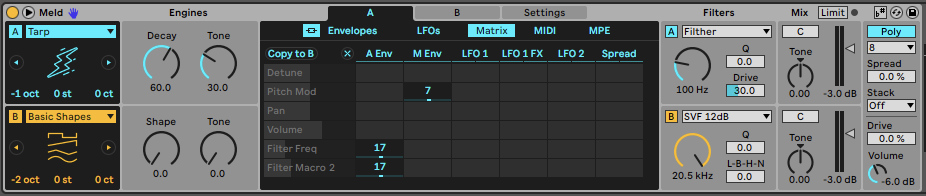
Now open Oscillator A's Matrix tab and assign the Modulation Envelope to the Pitch Mod, at a value of 7. Then, apply a value of 17 from the Amplitude Envelope to the Filter Frequency and Drive values. To display a modulation destination, click on the control or parameter in the device's interface. Once you've applied the modulation to Oscillator A, click Copy to B so that the same modulation is being applied to both oscillators.
5. Drive and Other Settings
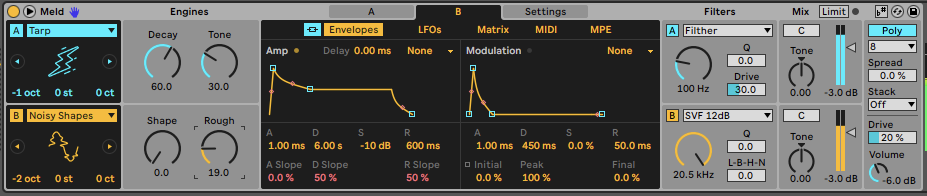
To give our 808 that last bit of grit and gel the two oscillators together, we can use Meld's Mixer Drive to gel the two oscillators together. Around 20% worked for us, but you can go lower for a cleaner sound, or higher for a dirtier 808. For a really dirty 808, try setting Oscillator B to the Noisy Shapes type and increasing the Rough parameter.
How to Create a Reese Bass with Meld
Next up, we'll use Meld to recreate another popular bass sound that has helped to define electronic music over the years. We recently published an article that highlighted four advanced Reese bass techniques, which we highly recommend checking out once you've created a simple Reese bass with Meld.
1. Oscillators and Setup
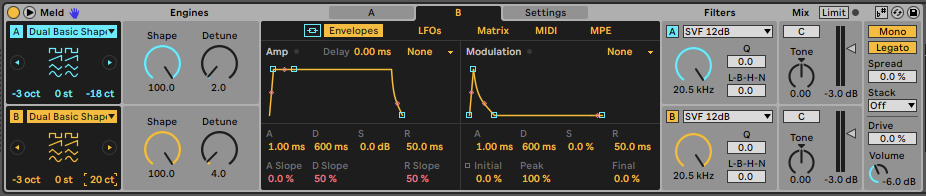
Reese basses are typically played with mono legato notes, so we'll start by putting Meld in mono. We'll then set both Oscillator A and B to the Dual Basic Shapes oscillator, and turn their Octave down to -3. We'll then increase the Shape values to 100 to use square waves, and set Oscillator A's Detune to 2 and B's to 4.
While the Dual Basic Shapes oscillator already contains two oscillators, which are detuned against each other with the Detune Engine, the Reese bass is characterised by a thick phasing sound. We can emphasise this by further detuning each oscillator against each other with the oscillator tuning. We've offset the cents by around 20 in either direction.
2. Filters
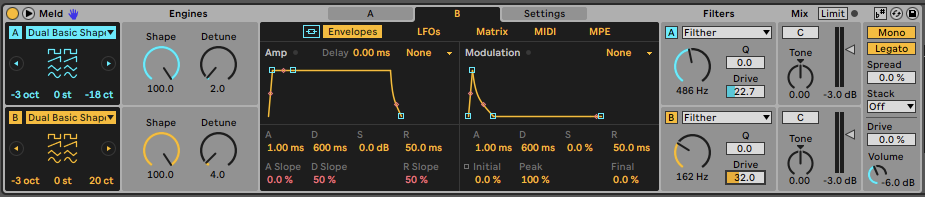
Once again, the Filther filter helps us to achieve the desired level of drive and grit, but feel free to experiment with mixing and matching any of the many filter types in Meld. We've used this filter type for both oscillators, setting the Cutoff to around 500Hz for Oscillator A, and 150Hz for Oscillator B. We've set the Drive of both filters to around 30.
3. Drive and Other Settings
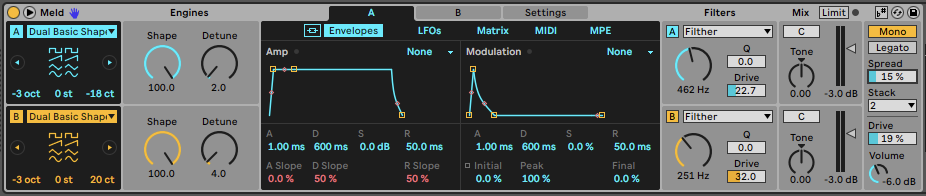
We can take the detuned sound of the classic Reese effect even further with Meld's inbuilt Spread and Stack features. Turn Legato mode off, Set the Spread to around 15, and the Stack to 2. This will introduce a sense of stereo movement that brings the sound to life. If you want to add even more edge to your Reese bass, introduce some further character using the Mixer Drive.
The result is a relatively raspy Reese bass, but you can opt for a smoother sound by reducing the amount of drive being applied, or by reducing the oscillator Shape amounts to use different oscillator waveforms.
How to Create an M1 Organ Bass with Meld
The M1 Organ Bass is perhaps best known for providing the lead melody in Robin S' classic House hit, Show Me Love. The sound is a preset from the Korg M1 keyboard, which contains plenty of low end as well as that unmistakable bell-like pluck further up the frequency range. For this reason, creating your own M1 Organ Bass gives you deeper control over the inner workings of the sound.
1. Oscillators - Instance One
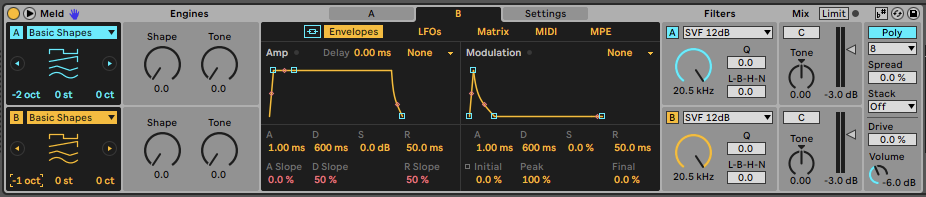
The original M1 Organ Bass sound is made from a number of voices, stacked across octaves and perfect fifths. For this reason, we'll actually be using two instances of Meld, but let's start with the first instance for now. We can leave both oscillators in the Basic Shapes mode, setting Oscillator A to -2 octaves and Oscillator B to -1 octave.
2. Envelopes and Drive - Instance One
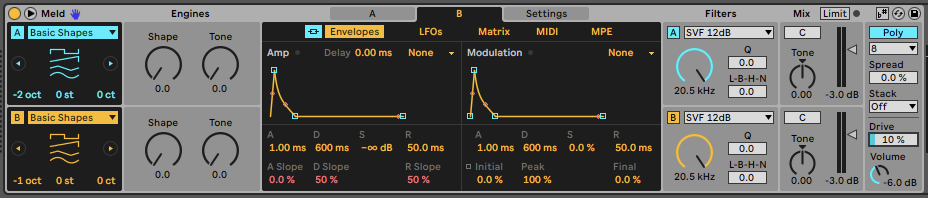
Next, let's create a pluckier sound by linking the two oscillators' envelopes and reducing the sustain to -∞. That's pretty much it for the first instance of Meld, although we've applied 10% Drive to the output to give the sound a bit of character.
3. Duplicating Meld

Now we'll add a second instance of Meld by clicking on the first instance and pressing Ctrl/CMD + G to add it to a new Instrument Rack. Now highlight the first chain and press Ctrl/CMD + D to duplicate it. We now have two identical instances of Meld playing the same MIDI.
4. Oscillators - Instance Two
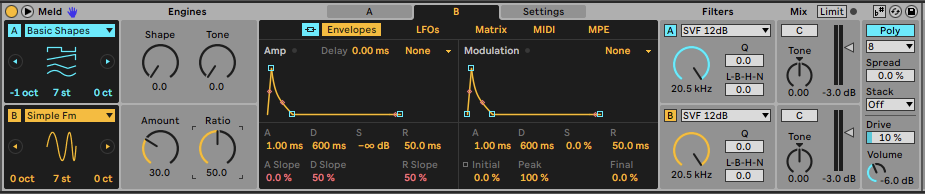
Select the second instance of Meld and increase each oscillators' pitch by 19 semitones, or one octave and seven semitones. This will give our sound that unique organ-like sound. We can take this further by setting Oscillator B to the Simple FM type, setting the Amount to 30, and the Ratio to 50.
5. Envelopes - Instance Two
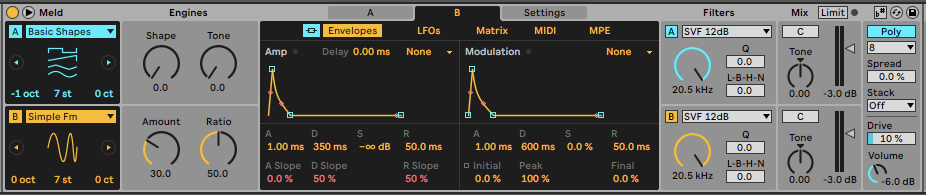
To refine the tone and contour of the sound, we want to make the higher frequency elements of the second instance more plucky. To do this, simply reduce the Amp Decay of the second instance of Meld to around 350ms.
6. Fine Tuning

Using this method of recreating the M1 Organ Bass sound gives us considerably more control over its overall tone. Try altering the level of the high and low instances of Meld to get it to fit better in the mix, or adjust amplitude envelopes to suit the tempo and programming of your track. We've also applied some subtle Reverb, Delay, and Overdrive to give the sound slightly more character.
Using Classic Electronic Music Samples
While you can create almost any sound imaginable with synthesis, sometimes you just want to get a project underway while you're feeling inspired. In these cases, you need a strong collection of professional samples to hand. Sample Market boasts a huge catalogue of high-quality samples that span a range of electronic music styles. Head to the Sample Market store now to stock up on radio and club-ready sounds you can use in your next production.
